Planning Your Diecast Car Repaint
Repainting a diecast car can be a rewarding hobby, transforming a tired model into a stunning display piece. However, success requires careful planning and preparation. Before you even touch a can of paint, consider the scope of your project. Are you aiming for a simple color change, or are you planning a full restoration with detailed modifications? Determine the level of detail you’re aiming for, research the specific model car and its original paint schemes, and set a realistic budget. This planning phase will save you time and frustration down the line, ensuring a smoother and more enjoyable repainting process. It’s also helpful to gather inspiration, looking at other repainted models online to get ideas for color combinations and techniques. Consider the environment where you will be working; a well-ventilated space is essential for safety.
Gathering Your Supplies
Having the right supplies is crucial for a successful diecast car repaint. This includes a selection of paints, primers, clear coats, and thinners. You’ll also need a variety of sandpaper grits, from coarse to fine, for surface preparation. Additionally, gather masking tape, masking putty (for intricate curves), and appropriate safety gear such as a respirator, gloves, and eye protection. Consider the specific type of paint you plan to use (e.g., acrylic lacquer, enamel, or urethane) and purchase the appropriate thinner and cleaning solvents. Don’t skimp on quality, especially with the paint and clear coat, as these will impact the final finish and durability of your repainted diecast car. It is also important to have soft cloths or microfiber towels for cleaning and wiping down surfaces.
Essential Tools for Repainting

The right tools can make all the difference when repainting diecast cars. A set of small screwdrivers is essential for disassembling the model. You’ll need various sanding tools, including sanding sticks and blocks, to achieve a smooth surface. An airbrush or spray gun is highly recommended for applying paint evenly, although aerosol cans can be used for beginners. Make sure you have an air compressor if you choose to use an airbrush. Other handy tools include a hobby knife or X-Acto knife for trimming and detailing, tweezers for handling small parts, and a magnifying glass to inspect your work. A well-lit workspace is crucial, consider using a desk lamp with adjustable lighting to ensure you can see every detail of your model and make sure your painting environment is free from dust particles.
Choosing the Right Paint
Selecting the right paint is a critical decision that will greatly impact the final appearance of your repainted diecast car. Acrylic lacquer paints are popular choices for their ease of use and quick drying times, but they may require more coats. Enamel paints offer excellent durability and a high-gloss finish but can take longer to dry. Urethane paints provide a balance of durability and a high-quality finish but require more advanced application techniques. Consider factors like the desired finish, the level of detail, and your experience when choosing a paint type. Always use paints specifically designed for model car painting to ensure compatibility and proper adhesion. Research paint brands and read reviews from other modelers to learn about their experiences with different products.
Preparing the Diecast Car
Preparing the diecast car for repainting is a crucial step. The quality of your surface preparation will determine the final finish of your repainted model. This process involves carefully disassembling the car, cleaning it thoroughly, and preparing the surfaces to accept the new paint. Taking your time during this phase is vital to achieving a professional-looking result. Before you start, make sure your work area is well-lit and organized, and have all your tools and supplies readily accessible. This will help you stay focused and avoid any unnecessary delays during the preparation process. Make sure you wear proper safety gear such as gloves and eye protection to avoid any damage.
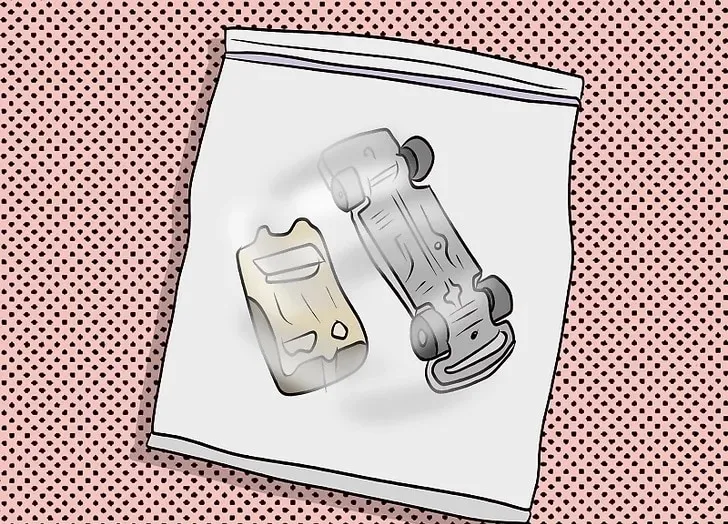
Disassembly and Cleaning

Start by carefully disassembling your diecast car. This typically involves removing the wheels, windows, interior components, and any other detachable parts. Use the appropriate screwdrivers and tools to avoid stripping screws or damaging the model. Once disassembled, thoroughly clean all the parts with warm, soapy water to remove any dirt, grease, or old paint residue. A soft brush can be helpful for scrubbing hard-to-reach areas. Rinse the parts thoroughly and allow them to dry completely before moving on to the next step. Proper cleaning is essential for ensuring good paint adhesion and preventing imperfections in your final finish. Make sure to keep all small parts organized so you don’t lose anything.
Surface Preparation
Surface preparation is key to achieving a smooth and professional-looking finish. Use a variety of sandpaper grits to remove the old paint and create a smooth surface for the new paint to adhere to. Start with a coarser grit (e.g., 400-grit) to remove the bulk of the old paint, and gradually move to finer grits (e.g., 600-grit, 800-grit, and even 1000-grit) to refine the surface. Wet sanding can help minimize scratches and keep the sandpaper from clogging. Pay close attention to details like edges, curves, and panel lines, ensuring a consistent surface throughout. Once the surface is smooth, clean it again with a degreaser or wax and grease remover to remove any sanding dust. This step ensures that the primer will adhere properly.
Priming the Diecast Car
Priming is an important step in the repainting process, as it provides a base for the color coat. Choose a primer compatible with your chosen paint type. Apply a thin, even coat of primer, holding the spray can or airbrush at a consistent distance from the surface. Avoid applying too much primer at once, which can lead to runs or drips. Multiple thin coats are better than one thick coat. Allow the primer to dry completely according to the manufacturer’s instructions before sanding lightly with a fine-grit sandpaper (e.g., 1000-grit) to remove any imperfections. Priming provides a uniform surface, promotes adhesion of the color coat, and helps the final color appear more vibrant. Inspect the primed surface carefully for any flaws and address them before applying the color coat.
Painting Your Diecast Car

With your diecast car properly prepared and primed, it’s time to apply the color coat. This is where you will see your model car begin to transform. Achieving a professional-looking paint job requires patience, precision, and attention to detail. Take your time and work in a well-ventilated area to ensure a smooth and even finish. Remember to wear the appropriate safety gear, including a respirator and gloves. Choose a calm day with low humidity and avoid spraying in direct sunlight. Multiple thin coats are preferable to prevent runs or drips. Follow the manufacturer’s instructions for drying and curing times between coats to get the best possible results. Take your time, and the results will be worth the effort.
Applying the Base Coat
Apply the base coat in thin, even layers, using an airbrush or spray can. Hold the nozzle at a consistent distance from the surface and move the spray gun in a smooth, overlapping motion. Avoid spraying too much paint at once, which can lead to runs or drips. Allow each coat to dry completely before applying the next one, usually following the manufacturer’s recommended drying times. Several thin coats will provide a better finish than one thick coat. Inspect the surface between coats for any imperfections and lightly sand them out with fine-grit sandpaper. Once the base coat is complete and fully cured, inspect it carefully for any flaws before moving on to the clear coat.
Applying Clear Coat
Applying a clear coat is essential for protecting the base coat and adding depth and shine. Choose a clear coat that is compatible with your base coat and apply it in thin, even layers, following the same techniques you used for the base coat. Multiple thin coats are better than one thick coat. Allow each coat to dry completely before applying the next one. After the final coat of clear, let the model cure completely. This might take several days or even weeks, depending on the type of clear coat. After curing, you can wet sand and polish the clear coat to remove any imperfections and achieve a smooth, glossy finish. The clear coat provides a durable protective layer that will help your repainted diecast car look its best for years to come.
Adding Decals

If you’re adding decals, this is the time to apply them. Carefully cut out the decals and apply them to the surface, using a decal setting solution to help them conform to the curves of the model. Use a soft cloth or cotton swabs to gently press the decals into place, removing any air bubbles. Once the decals are dry, you can apply another layer of clear coat over them to protect them and blend them seamlessly into the finish. This step requires patience and a steady hand, especially when dealing with intricate decals. Proper application will make the difference between a professional-looking model and one with poorly applied decals. Take your time, and don’t rush the process.
Reassembly and Finishing Touches
Once the paint is dry and cured, it’s time to reassemble your diecast car and add the finishing touches. This is where you put all the pieces back together and bring your model back to life. This process requires careful attention to detail to ensure that all the components fit correctly and that the finished model looks its best. Before you start, inspect all the parts and clean them thoroughly. Now is the time to address any issues that may have arisen during the painting process and make any necessary adjustments. The final touches can significantly enhance the appearance of your repainted diecast car, making it a true work of art.
Polishing and Detailing
After the clear coat has fully cured, you can polish the model to achieve a high-gloss finish. Start by wet sanding the clear coat with very fine-grit sandpaper (e.g., 2000-grit or finer) to remove any imperfections, such as dust particles or orange peel. Follow this with polishing compounds, progressing from coarser to finer grades, to remove scratches and bring out the shine. Use a polishing machine or a soft cloth and apply the polishing compounds in a circular motion. Detailing is the final step. Use detail paints and fine brushes to paint the trim, lights, and other small details on the model. Add any remaining decals or accessories, and make sure all the components are securely attached. Pay attention to small details, such as adding a glossy finish to tires or polishing chrome parts.
Final Inspection

Conduct a final inspection of your repainted diecast car, looking for any imperfections or areas that need further attention. Check for any runs, drips, or unevenness in the paint, and address them as needed. Ensure that all the components are securely attached and that the model is properly assembled. Take a step back and admire your work! If you are satisfied with the results, you can display your model proudly. If you’re not entirely happy with the results, don’t be discouraged; use it as a learning experience for your next project. Repainting diecast cars is a process that takes time and practice, so don’t be afraid to experiment and learn from your mistakes. Enjoy the hobby and the satisfaction of transforming a simple diecast car into a miniature masterpiece.